Click the link “Import” under the “Checklist” sub-module in the left navigation menu and the following screen will be displayed.
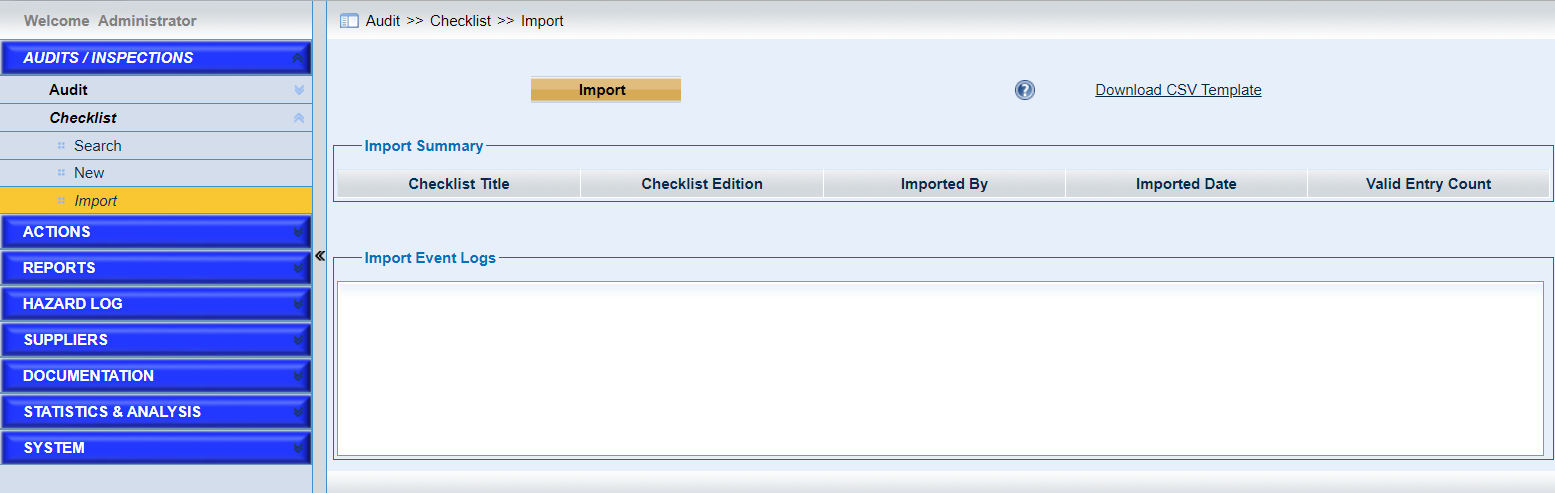
This page provides users to import the custom checklists with the templates and IOSA checklists.
Here are detailed introduction of the page.
•Download the templates.
Before starting to import the checklists,download the templates first.
Click the “Download CSV Template” to download the airline checklist template.
•Enter data.
•Save the file in UTF-8 format.
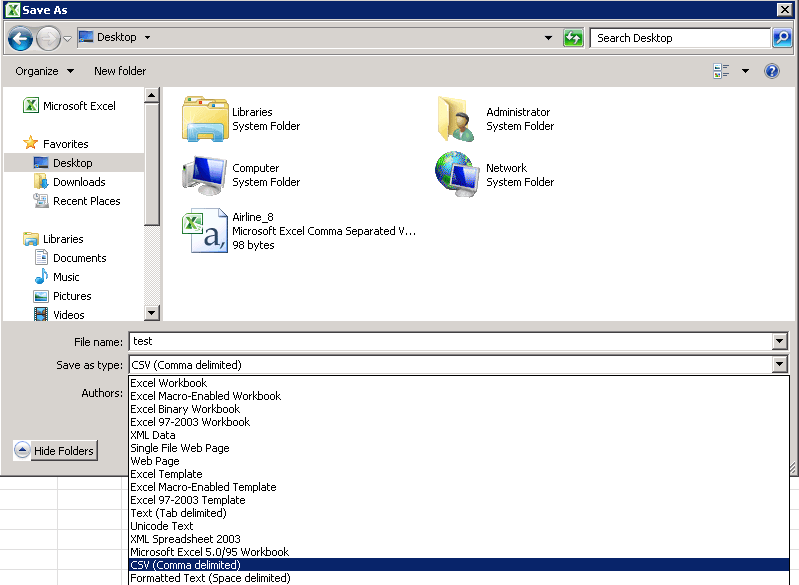
If the CSV file is operated with Microsoft Excel, please follow the steps below.
Steps are as follows for Excel 2007, Excel 2010, Excel 2013 and Excel 2016.
Step 1: Choose "File" → “Save As → “CSV(Comma delimited)”. And fill in the “File name”.
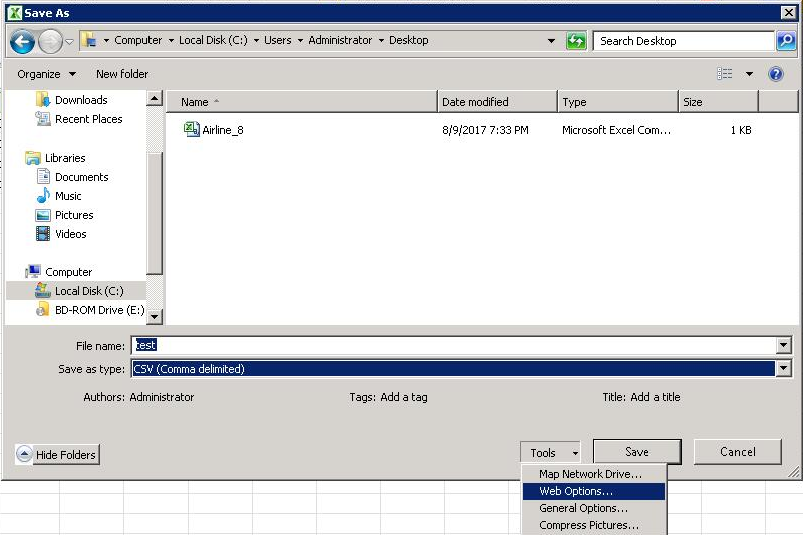
Step 2: Click "Tools"→select "Web Options...".
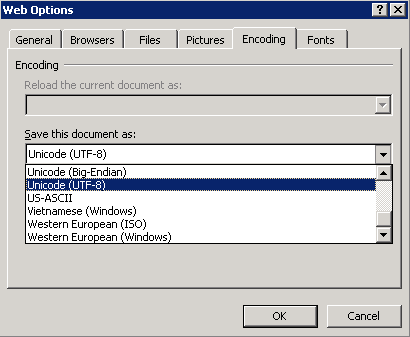
Step 3: Choose "Encoding"→"Unicode (UTF-8)". Then click "OK".
Step 4: Click “OK”. A window is displayed and choose “Yes”.

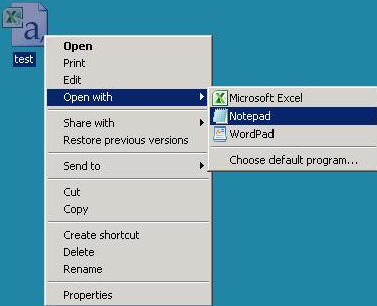
Step 5: Right click the CSV file saved in Step 4 and choose “Open with” →”Notepad”
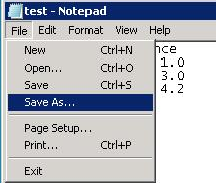
Step 6: Verify that the document is correct and choose “File”→“Save As…”.
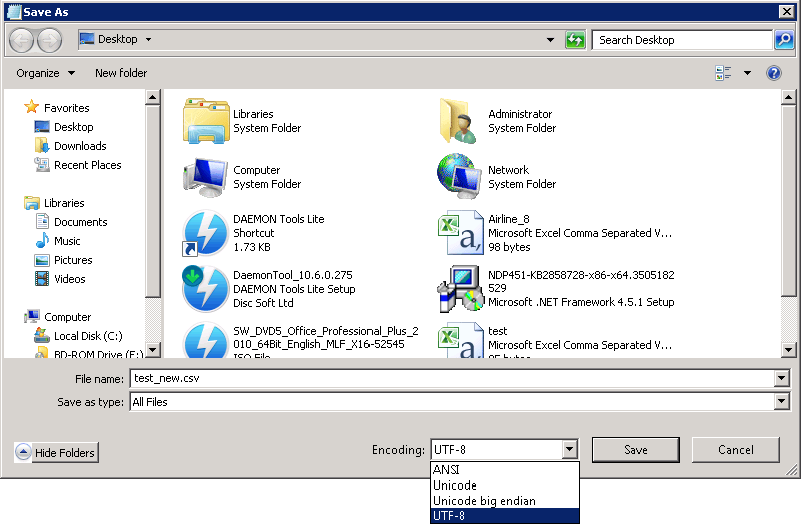
Step 7: Rename file with .csv extension name and choose "All Files" for field "Save as type". Choose “UTF-8” for field "Encoding". Then click “Save”.
•Click the “Import” button to choose the checklists template that has been completed.
The imported file will be displayed in the “Import Summary” list. Users can view how many valid entries are imported.
•Click the icon ![]() to get some prompt messages.
to get some prompt messages.
The following screen displays the custom checklist imported,
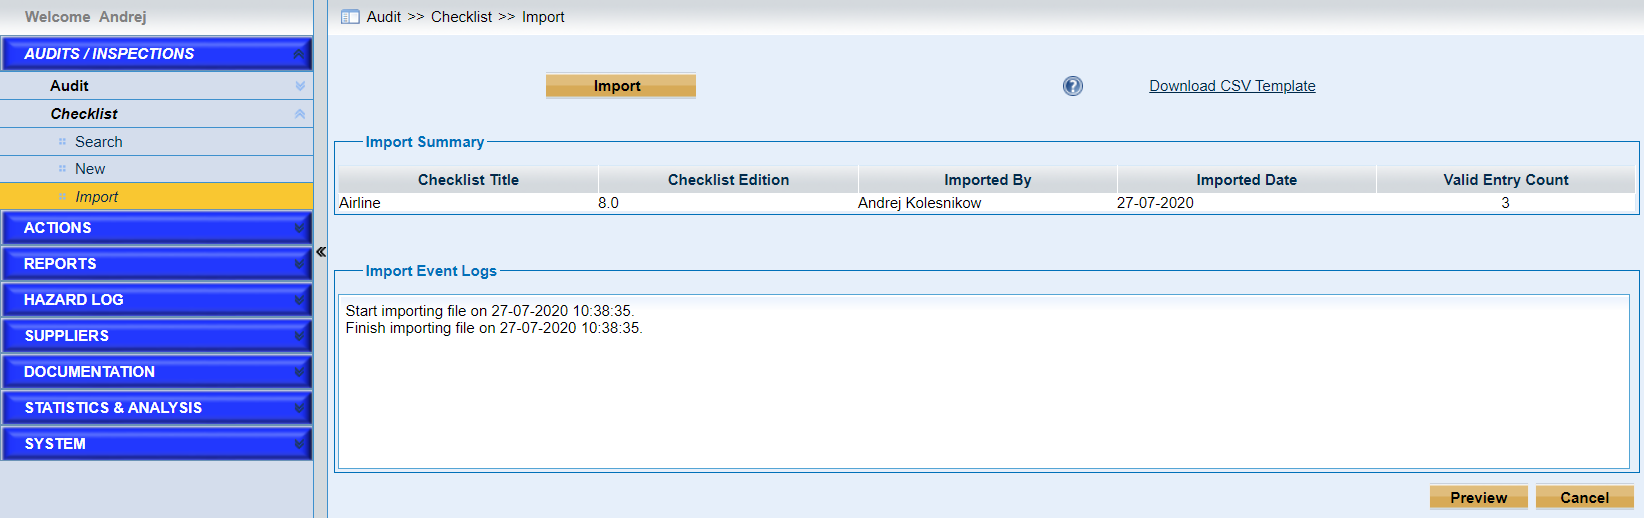
•View the logs in “Import Event Log” sub-form.
•Click the “Preview” button to preview the details of the checklist imported.
As the following screen displays,
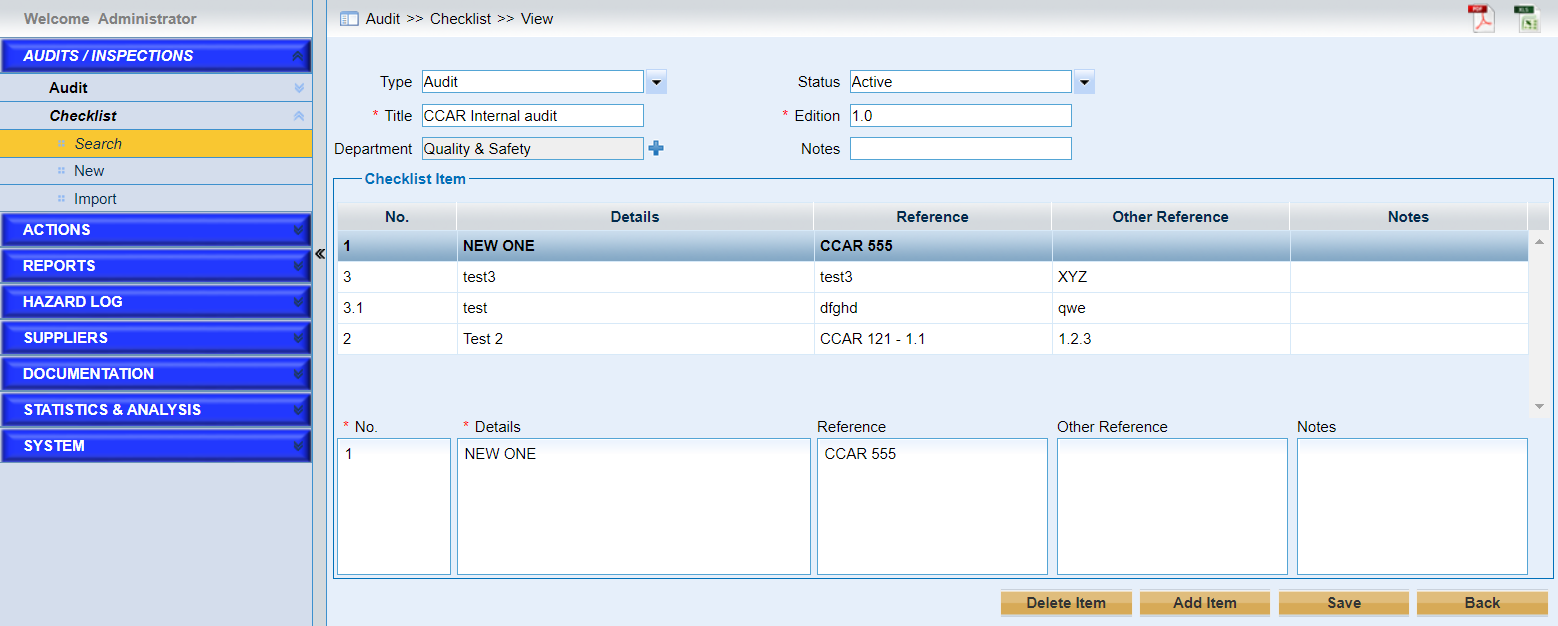
Users can update the details of the checklist imported, add new checklist item, edit or delete the existing checklist items.