Click the link “Customize Report” in the left navigation menu and the following screen will be displayed.
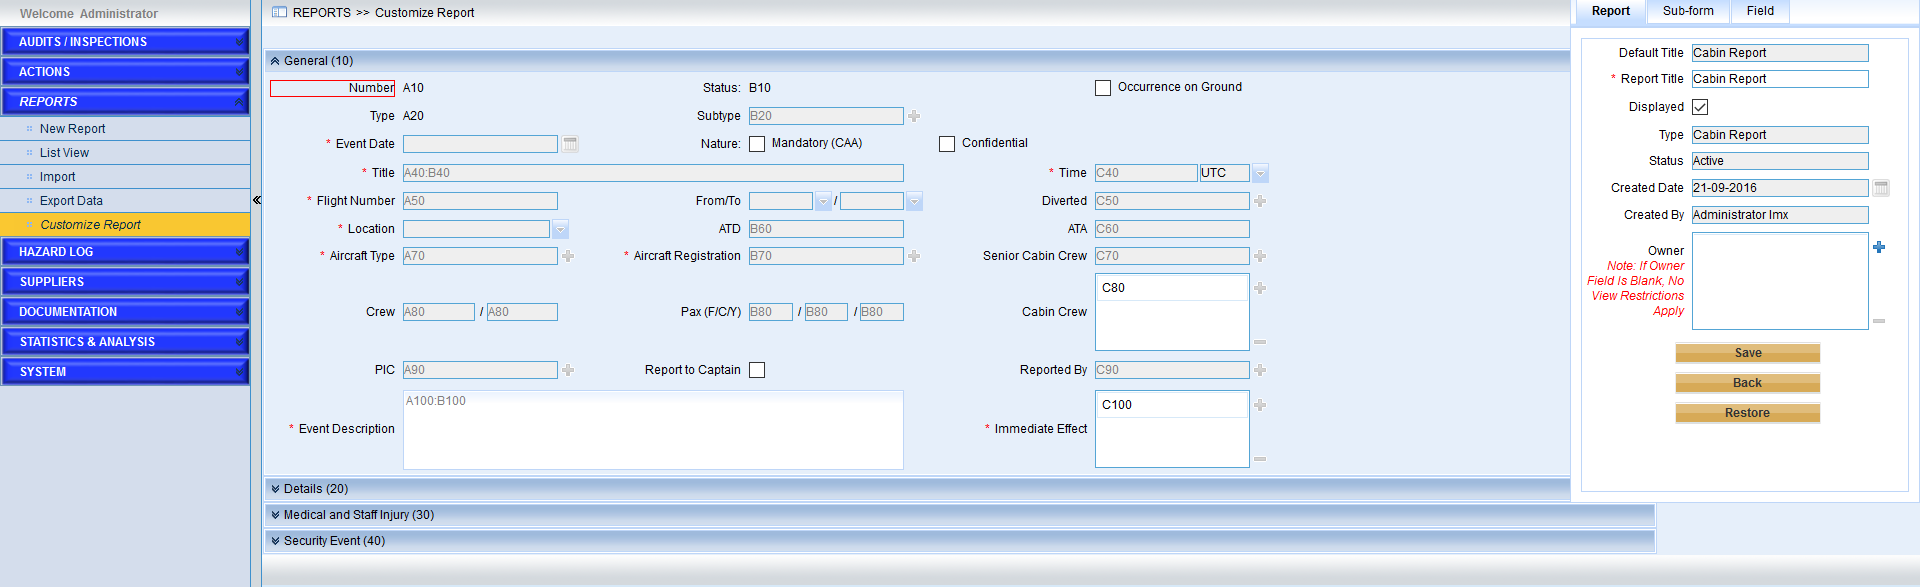
This page provide users to manage all the report forms, including the ones created by themselves and pre-defined forms. Besides,the offline report forms can also be downloaded.
Please follow the steps below to customize one report form.
1.Click the “Add Report Form” button.
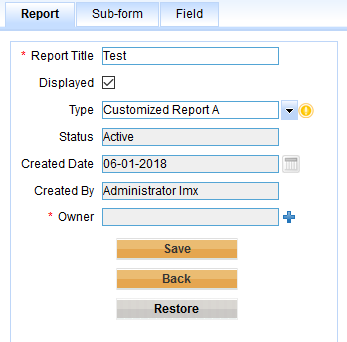
2.In the report tab, specify the fields listed.
Here users can customize the information of report.
➢Specify the report title
➢Set the ‘Displayed’ attribute
If it is ticked, the new,report will be shown in the “Type” field when creating a new report.Or else, it won’t be displayed.
➢Choose the “Type”
If the report template have been used, one yellow icon will be displayed.
Note |
If one template never used is chosen, click the other empty positions, then the chosen template type will be sent to servers and the yellow icon will disappear. |
➢Specify the owner
Please specify the department owner of the report. If specified, this kind of reports will work based on the privilege “My Department Only”.If the current user is assigned with “My Template Only” privilege, the rules will work as follows,1)He will see the templates belonging to his department, his parent department, his sub-level department, and the ones with blank “Owner”.2)The administrator will see all the templates.
➢Click the “Save” button to save the current report.
3.In the “Sub-form” tab, specify the fields listed.
Users can customize the information of the chosen sub-form. As we can see from screen below,
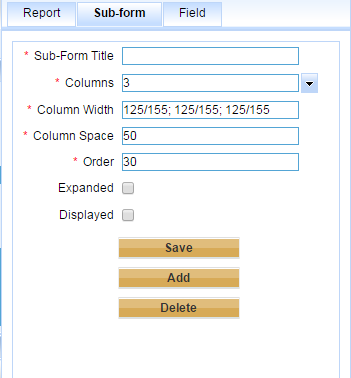
➢Specify the sub-form title.
➢Specify the columns.
➢Specify the column width.
Here we use “Title width / control width” to specify the width of title and control in one column. Use “;” to specify the groups that correspond to the columns specified in “Columns” field.
➢Specify the column space.
➢Specify the sub-form to be expanded by ticking “Expanded”. Or else, this sub-form will be set collapsed by default.
➢Specify the visibility of the sub-form with field “Display”.If it is ticked, the sub-form will be displayed in the report, or else, click the “Add Event” button to add it.
➢Click the “Save” button to save the sub-form.
As the screen below shows,
➢If you want to add another sub-form, please click “Add” button.
➢If you want to delete another sub-form, please click “Delete” button.
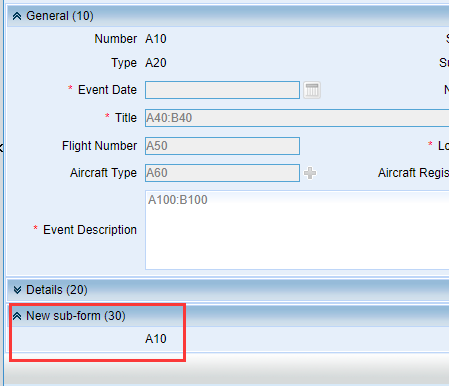
4.In the “Field” tab, you can add fields for one sub-form.
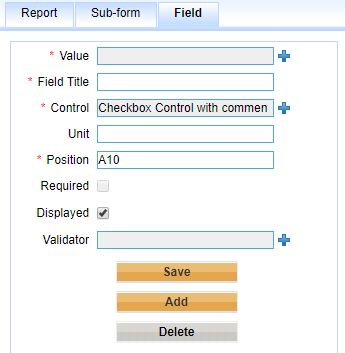
As the screen shows below, this is one default blank field pre-loaded.

Follow the steps below,
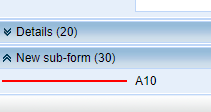
➢Make sure that the sub-form you want to add fields.
As the following screen shows, there is one red line if it is chosen,
➢Change the blank field.
Follow the steps below,
1.Click the ![]() icon following the field “Control”.
icon following the field “Control”.
One window will pop up. It lists all the pre-defined controls used in the pre-defined reports in IMX system.
2.Choose one appropriate control.
After one contnol is chosen, the layout of “Field” tab will be changed. As the following screen shows,
➢Choose value by clickisg the icon ![]() .
.
In the pop window, the values that have been used in IMX and that can be customize are listed.
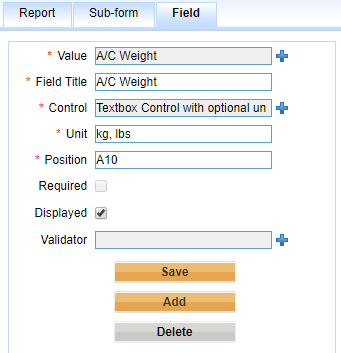
For the values used in IMX, the controls are pre-defined. For example, if “A/C Weight” is chosen, the other fields will be filled out automatically.
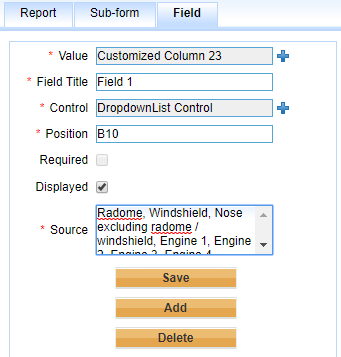
For the values can be customized, IMX system provides 100 values for customization. As the screen below shows,
➢Specify the field title.
➢Specify the connrol for this field.
➢Specify the position.
Here IMX system uses “alphabetic + number” format to represent column and row, for example, “B10”, it represents the field will be placed in the second column and the first row.
If one field occupies more than one column, uses “:”. For example, “A10:B10”, this means that this field occupies two columns in first row.
➢Specify the field to be mandatory by clicking “Required”.
➢Specify the visibility of this field with field “Displayed”.
➢Specify the other information.
➢Click “Save” button to save the field.